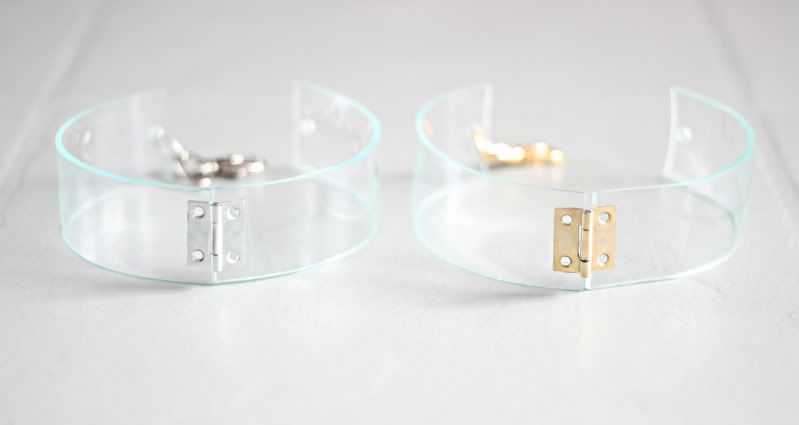
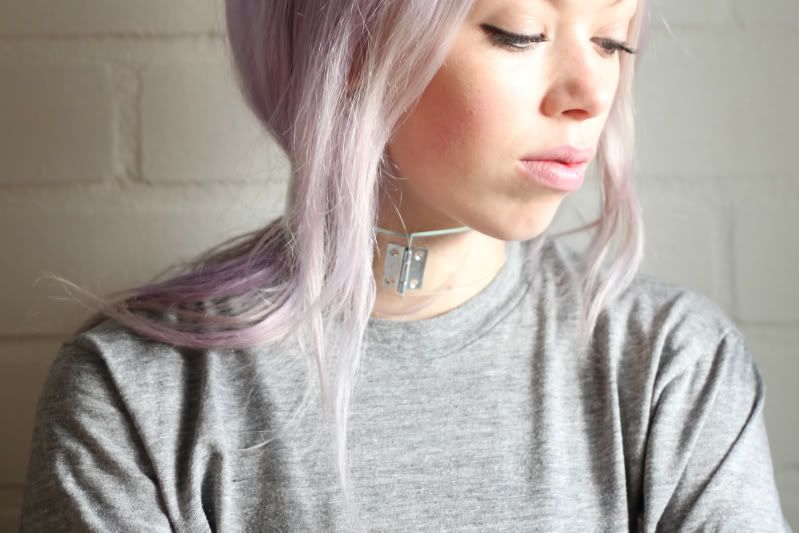
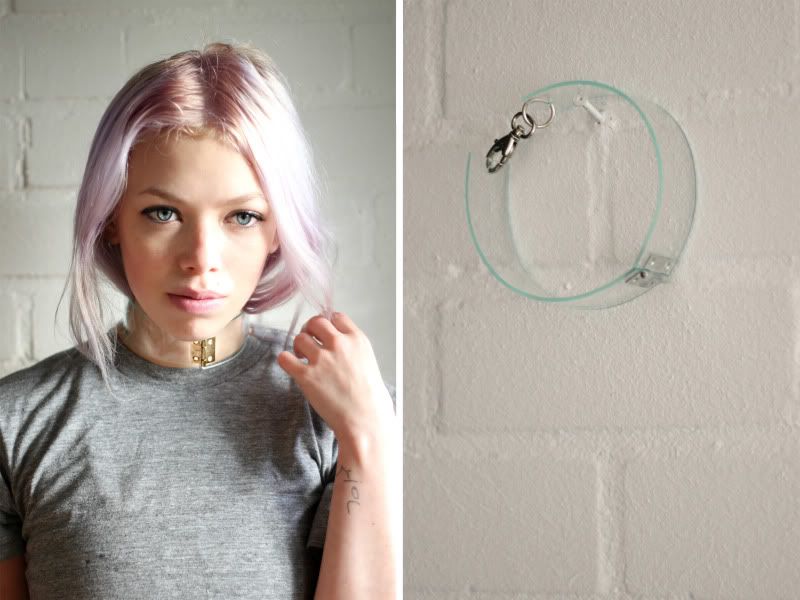
The transparent obsession continues. After making these DIY cuffs with perspex and finding out how easy it was, a million ideas for making more things with this material effortlessly came to mind. One of them was the neck cuff which is now a reality! Choosing between gold or silver metal details was too hard so I made one of each. Instructions below, and if something isn't clear, leave me a comment, I'll answer all questions!
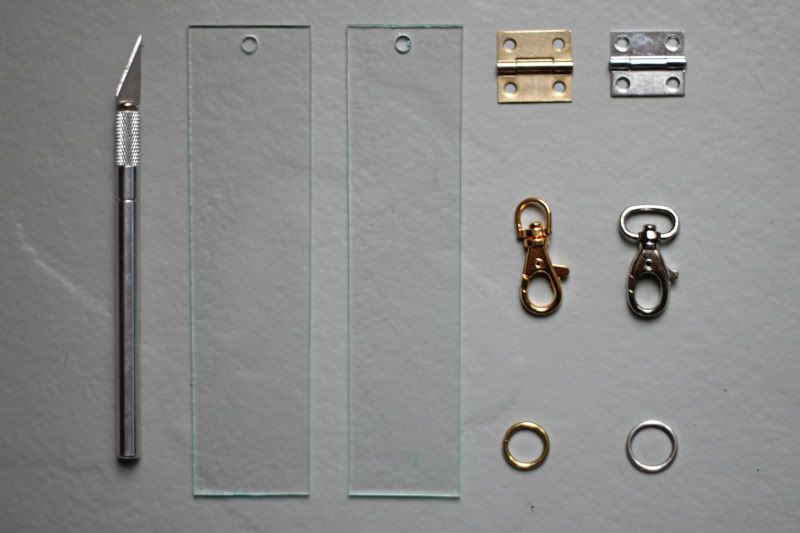
Take measurements: The length of your clasp should be how wide the gap between the plexiglass parts is. Measurements that I used were: outline of necklace 36cm, width 4cm, gap between two transparent parts 4 cm.
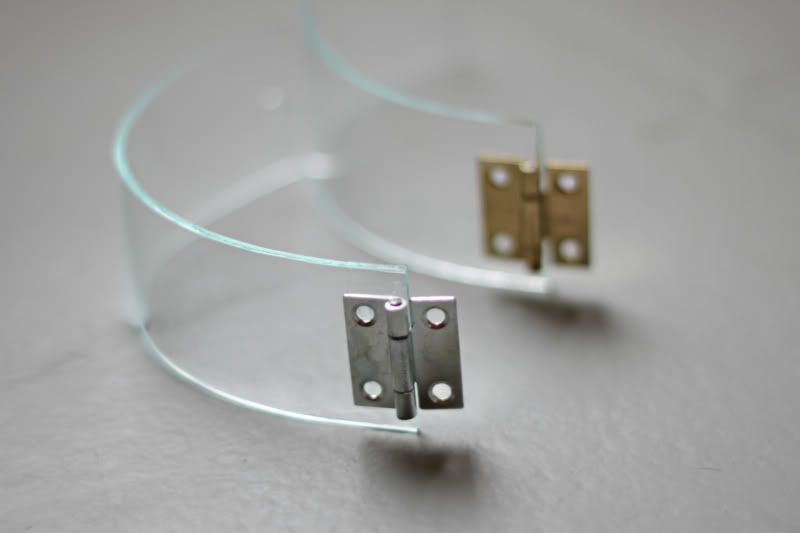
Cut the plexiglass: Making an incision with a stanley knife by letting the knife glide along a ruler. Then lay the plate of plexiglass on a table with the slit just over the edge. By pressing down you´ll be able to break it off with a nice and clean cut. Now you should have a rectangle which you can again break into smaller pieces until you have two rectangles that are 16cm long and 4cm wide. Using any kind of drilling machine (It is recommended to use a drill for metal. As I didn´t own that I used one for wood and it worked just fine.) make a hole in each rectangle.
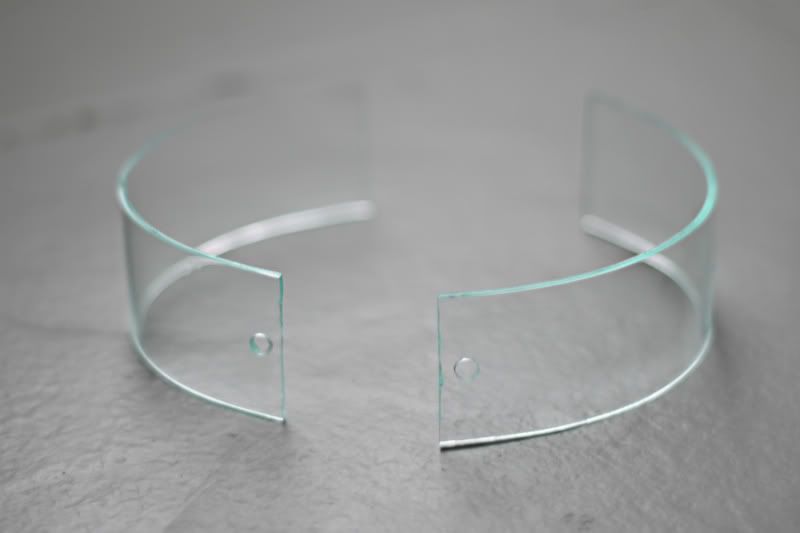
Bending it into shape: Heat your oven to 150 °C and put your rectangles inside one at a time on an oven plate. After 3 to 4 minutes take it out with oven mittens and bend it into shape by laying it over a round object with an outline of apx 36cm (sauce pan? plant pot?).
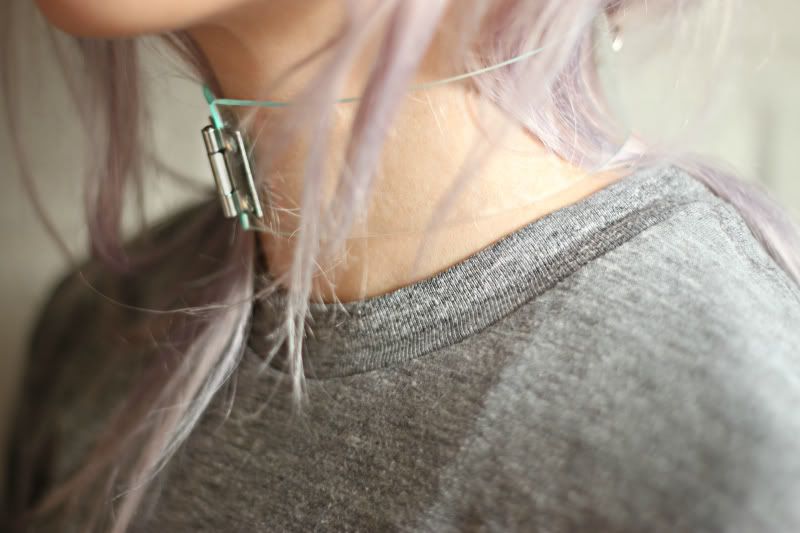
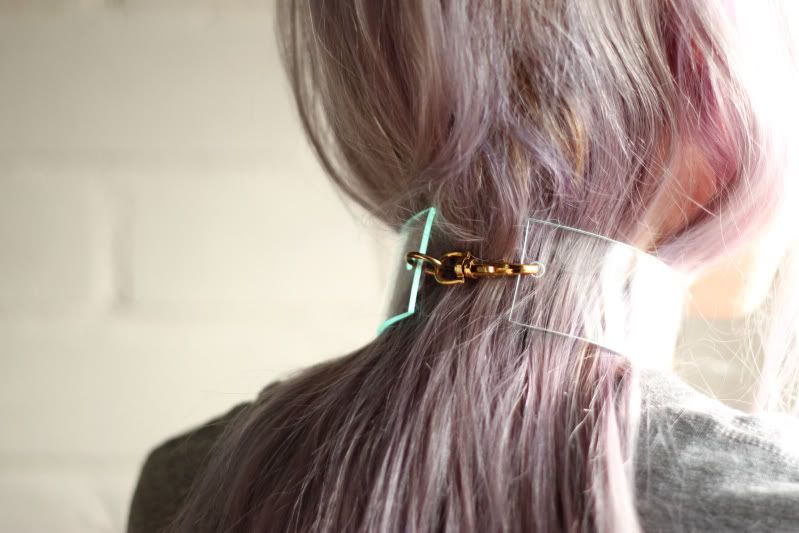
Finishing: Now you can add the hardware. I used a tiny metal hinge and a clasp to connect the transparent parts. The hinge is attached with epoxy glue but if you have more time on your hands you could also use small screws. Good luck!
No comments:
Post a Comment